All guides
Print QR codes and write NFC tags
Put a code at every stop and every location, so guards prove they were there. Print QR codes from the computer or your phone, and write NFC tags with your phone.
Version 2026-11-07 · TeamMap 3.0.54
Before you start
- An owner, admin, manager or dispatcher login. On a computer, sign in at app.teammap.co. On your phone, use the TeamMap app.
- QR code scanning and NFC scanning turned on for your team (Team settings).
- For QR codes: a printer, and sticker paper or plain paper with clear tape. Outside, use weatherproof stickers or laminate them.
- For NFC tags: blank NTAG213, NTAG215 or NTAG216 tags (stickers, cards or key fobs), and a phone with NFC (iPhone XS or newer, or an Android phone with NFC on). On metal, use "on-metal" tags.
Print QR codes on the computer
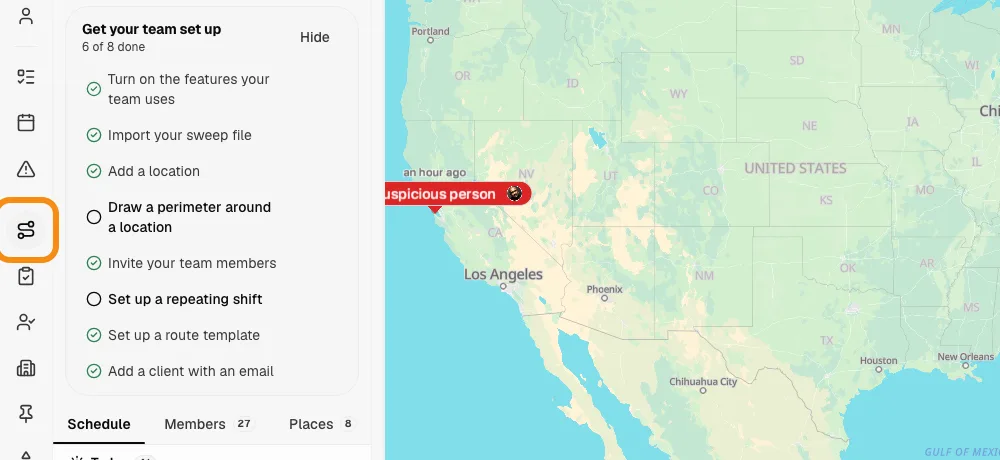
Step 1Open the route template
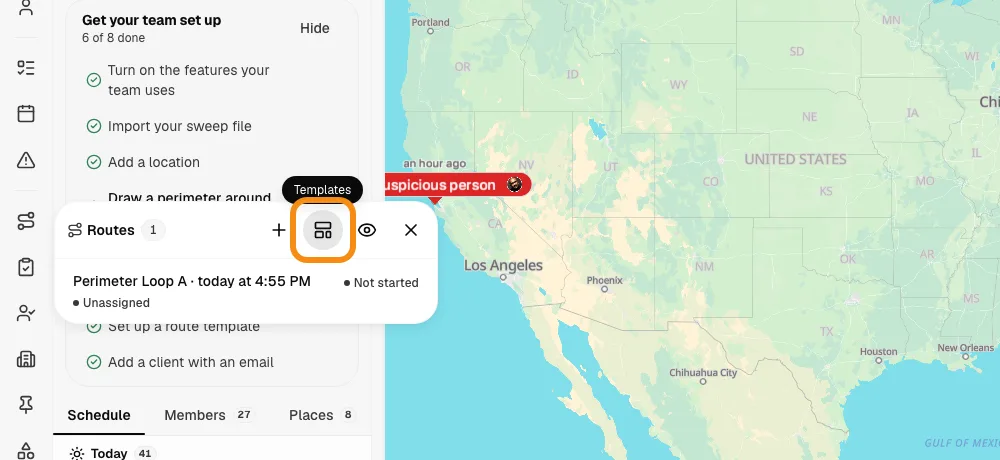
- In the bar on the left, click Routes, then the Templates button.
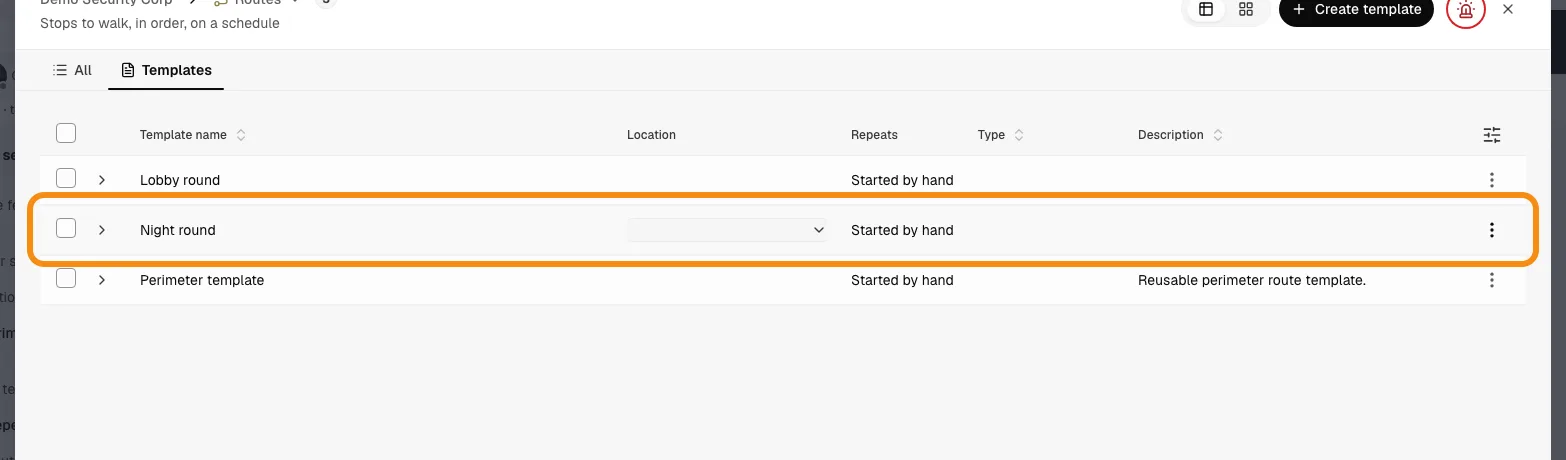
- Click the name of the route template you want stickers for.
Step 2Print a sticker for each stop
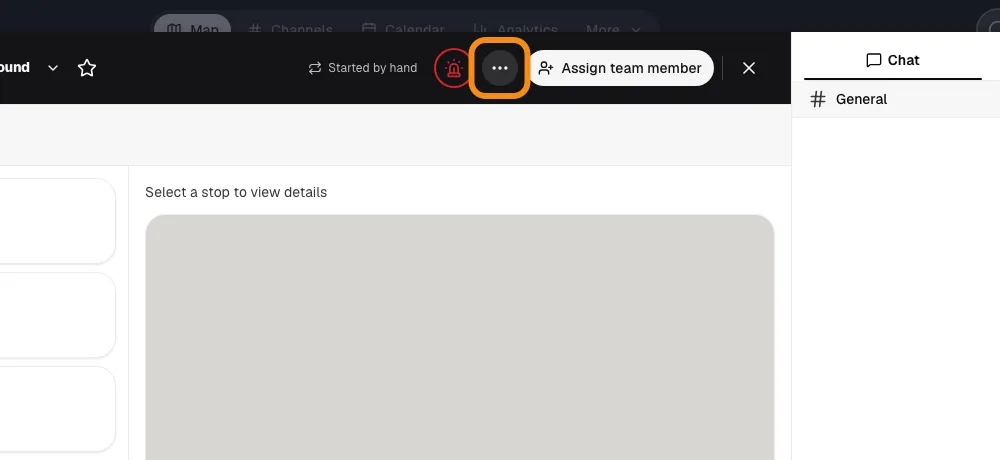
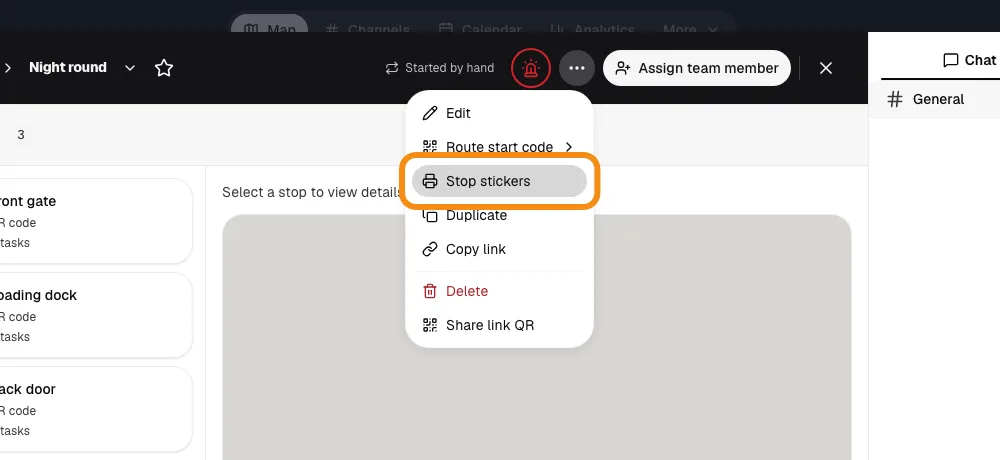
- Click the three dots at the top of the template, then Stop stickers.
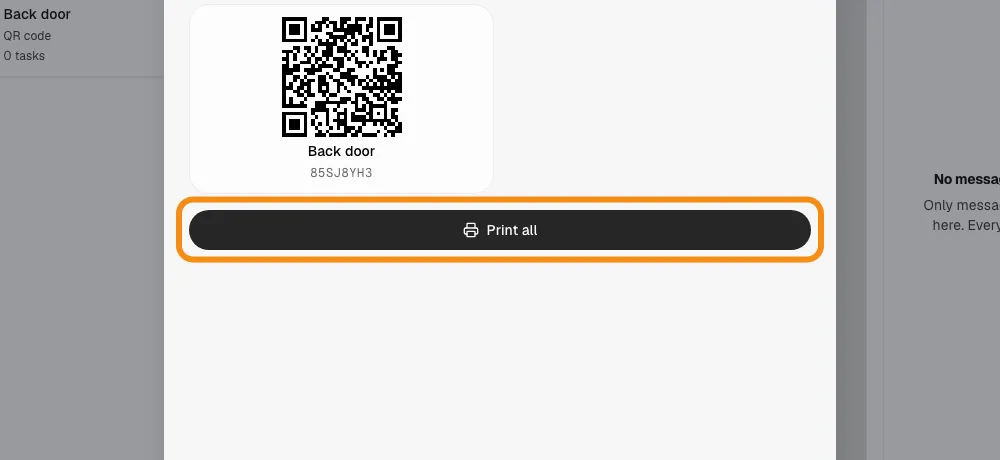
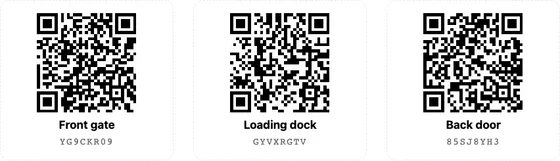
- Every stop that asks for a QR scan has its own sticker, with its name and a short code under it. Click Print all.
- Cut along the dashed lines and stick each one up at the stop with its name.
- No stickers? No stop asks for a QR scan yet. Click Edit, set the stop's proof to QR code, and save.
Step 3Print a location's QR code
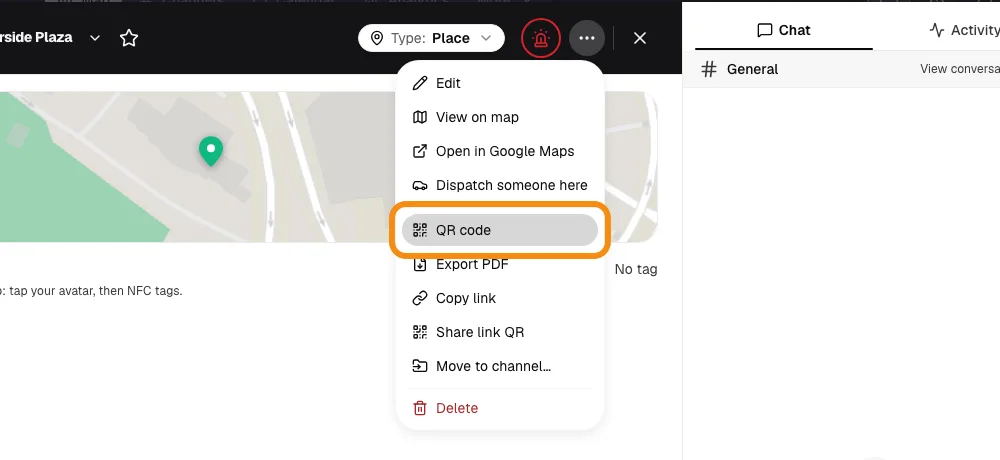
- Open the location: in the bar on the left, click Locations, then click its name.
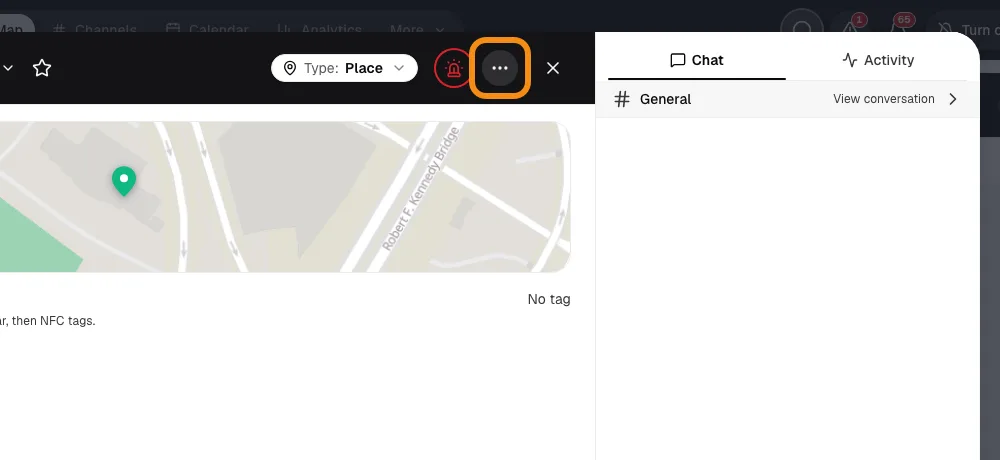
- Click the three dots at the top, then QR code.
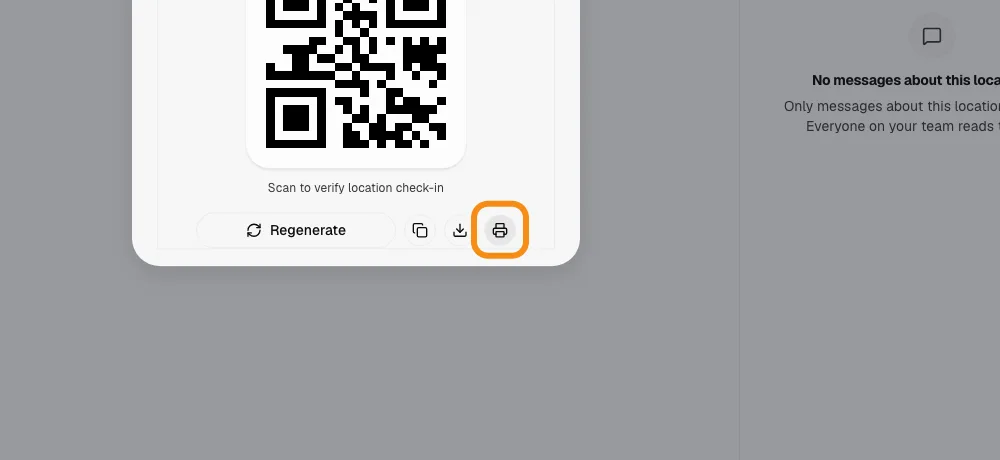
- Click the printer button. Post the code where guards start their shift. If your team asks guards to scan the location to clock in, this is the code they scan.
- Regenerate makes a new code, and the old one no longer clocks guards in. Only use it if a sticker was lost or copied, then print the new one and swap it.

Print QR codes on your phone
Step 4Save a QR code on your phone
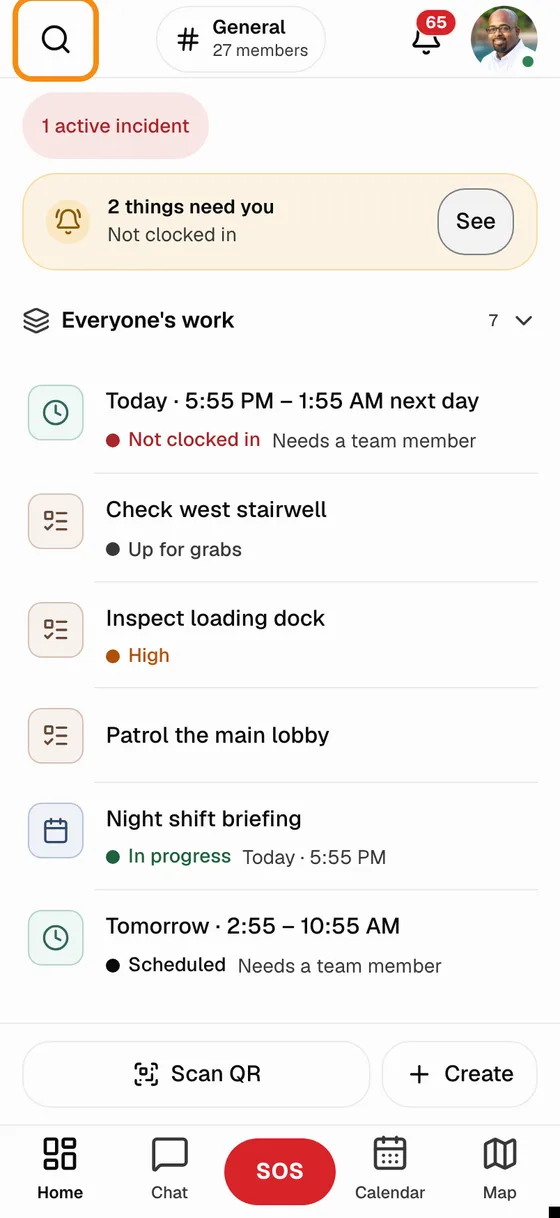
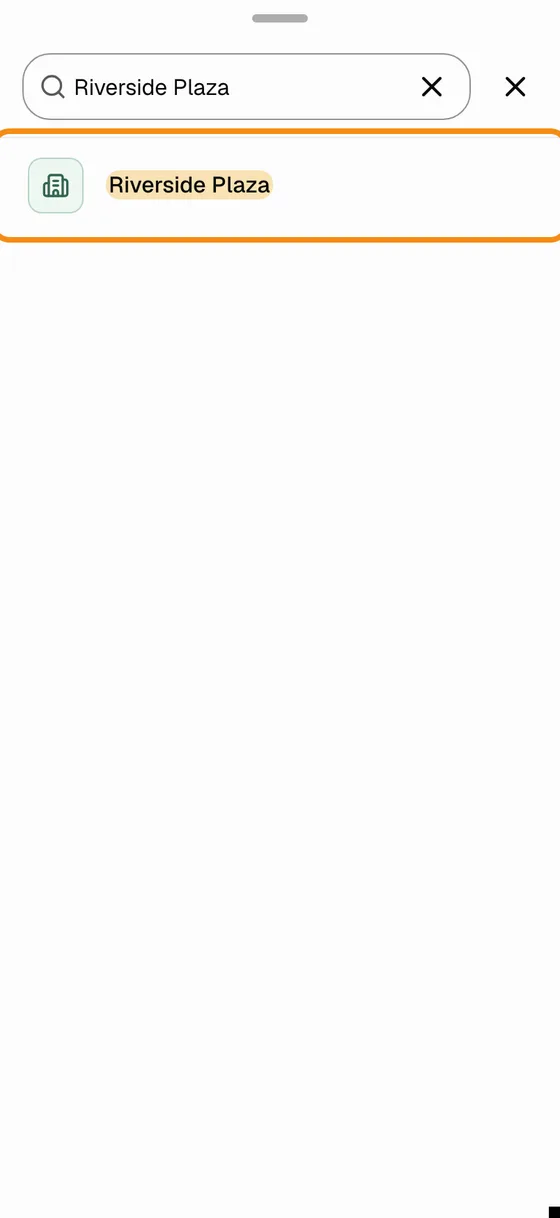
- In the TeamMap app, tap the search at the top, type the location's name and tap it.
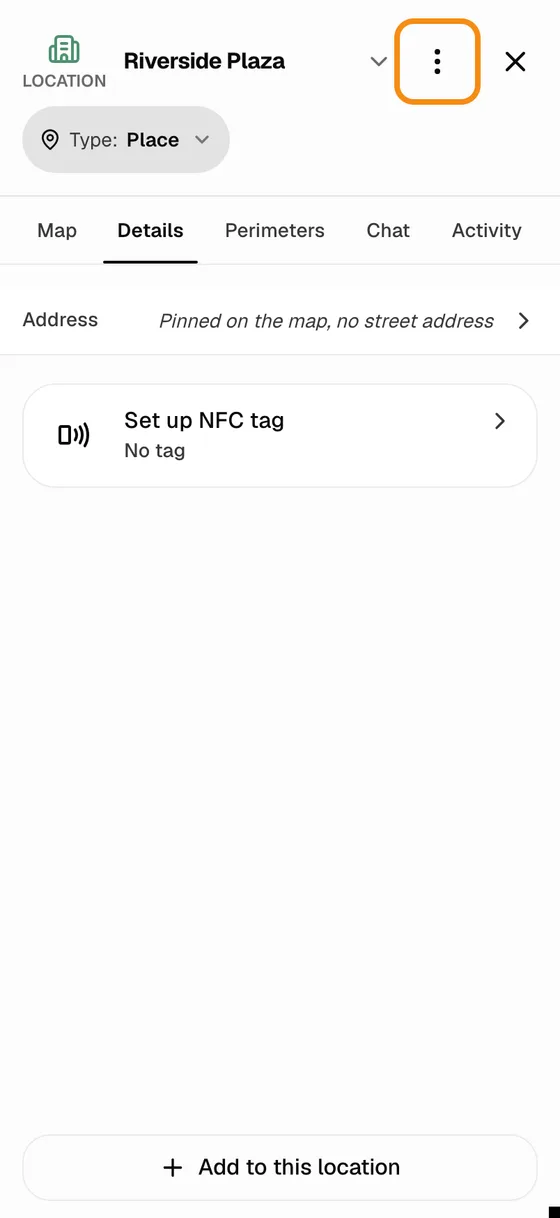
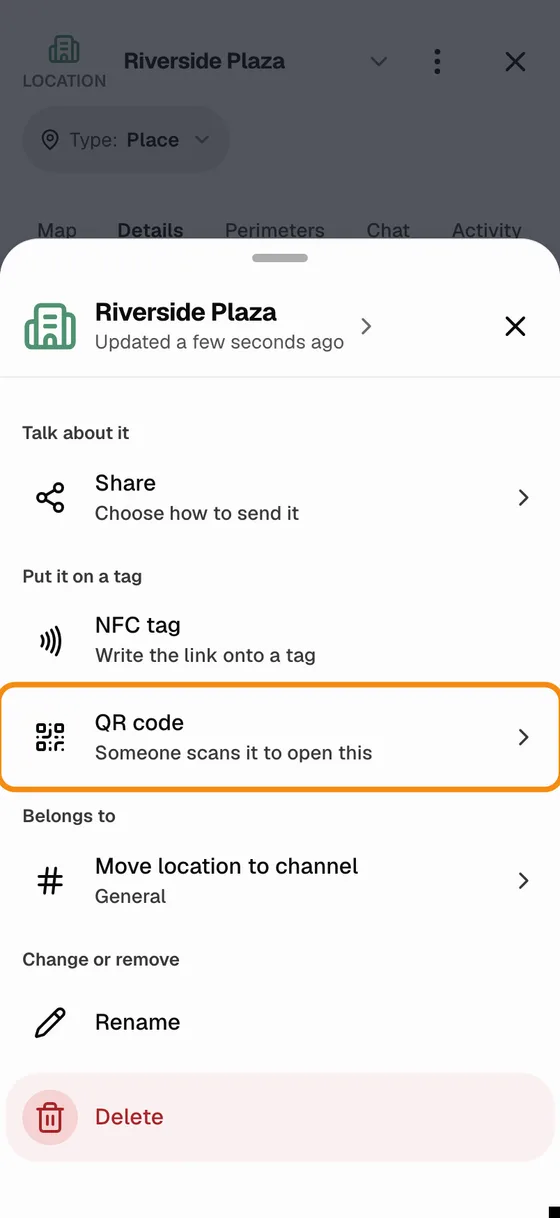
- Tap the three dots at the top, then QR code. Scanning this code opens the location in TeamMap.
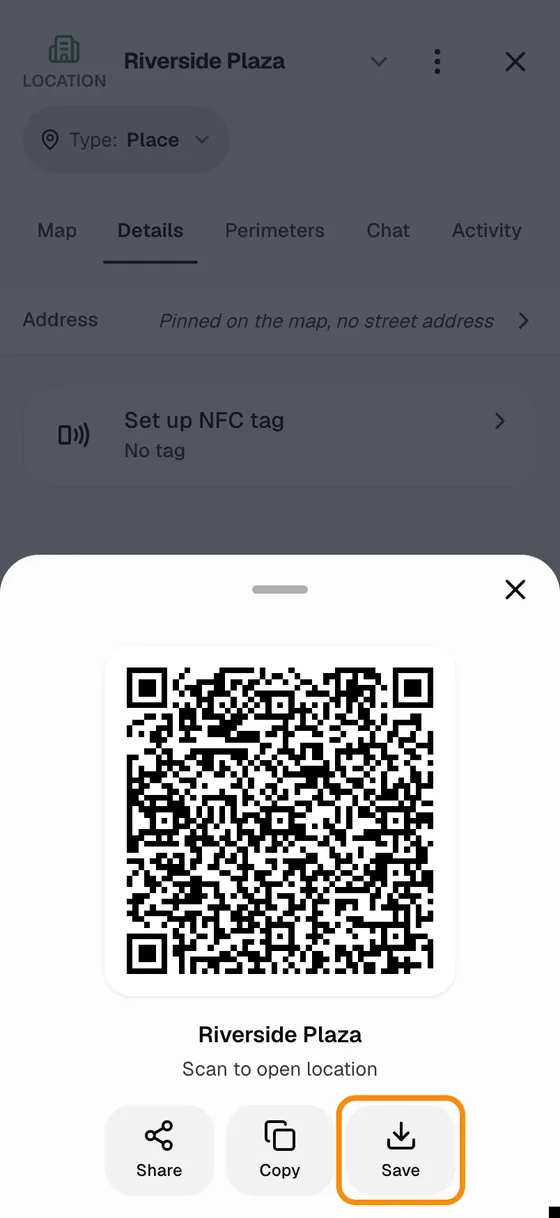
- Tap Save. Your phone's share menu opens. The saved picture is the code only, so write the location's name under it before you post it.
- iPhone: scroll down and tap Print, pick your printer, then tap Print. The printer must be on the same Wi-Fi. Or tap Save Image to keep it in Photos.
- Android: save it to Photos, open it there, tap the three dots, then Print.
- Stop stickers and the location clock-in code print only from the computer.
Write NFC tags on your phone
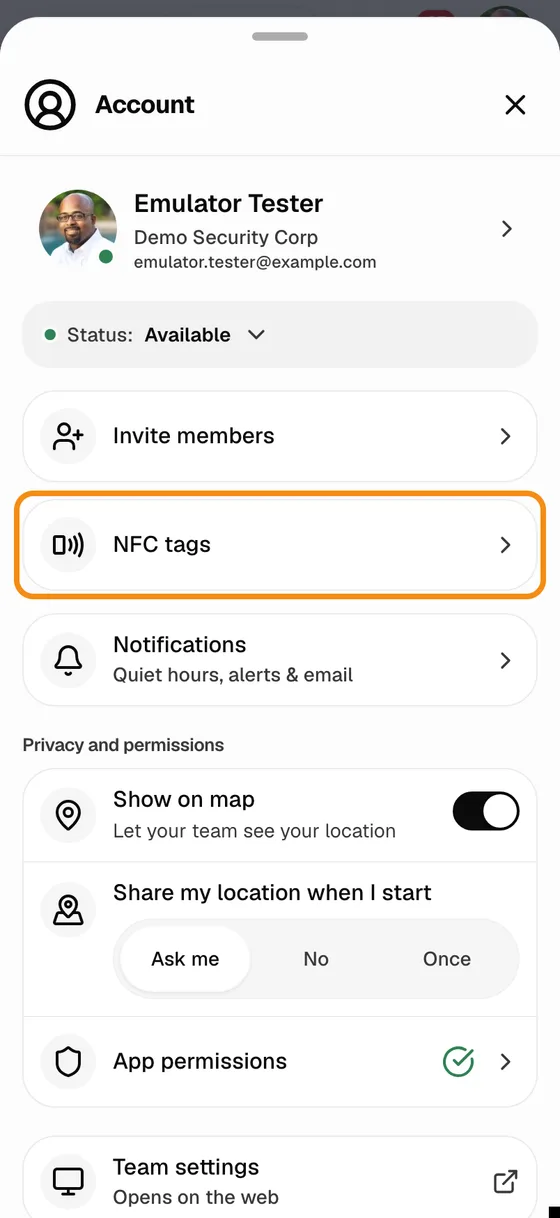
Step 5Open NFC tags
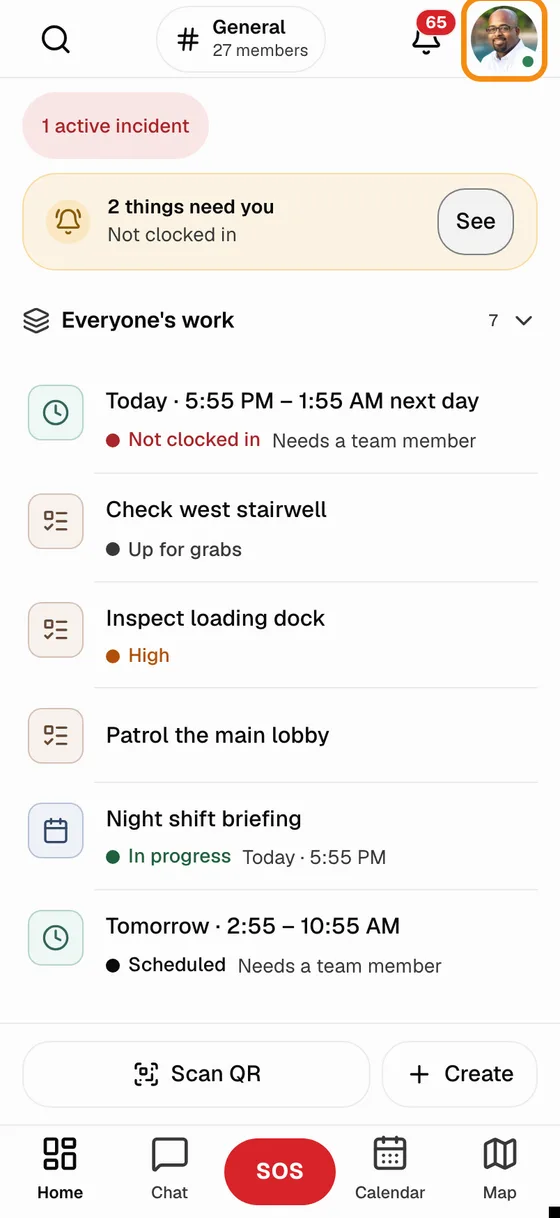
- Tap your photo at the top of the app, then NFC tags.
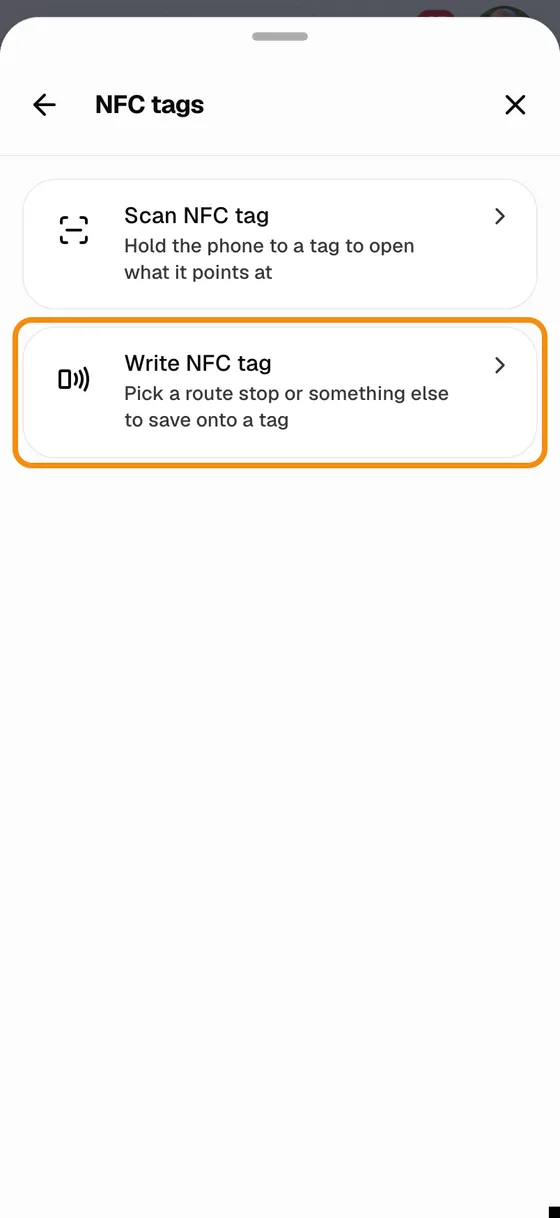
- Tap Write NFC tag.
- No NFC tags in the menu? Your phone has no NFC, NFC is off in the phone's settings, or the app needs an update.
Step 6Write a tag for each stop
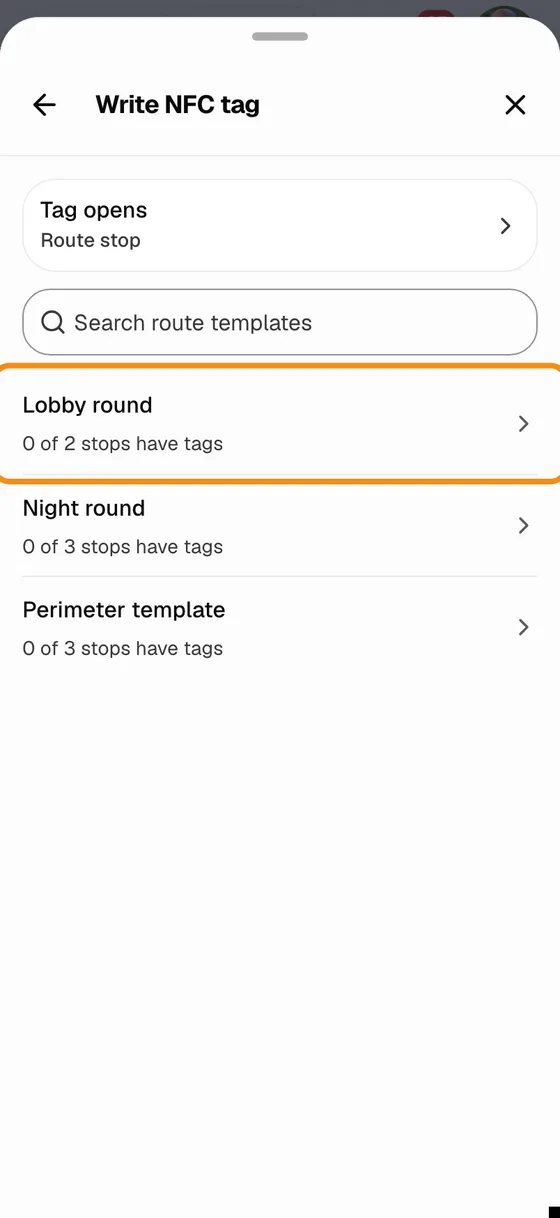
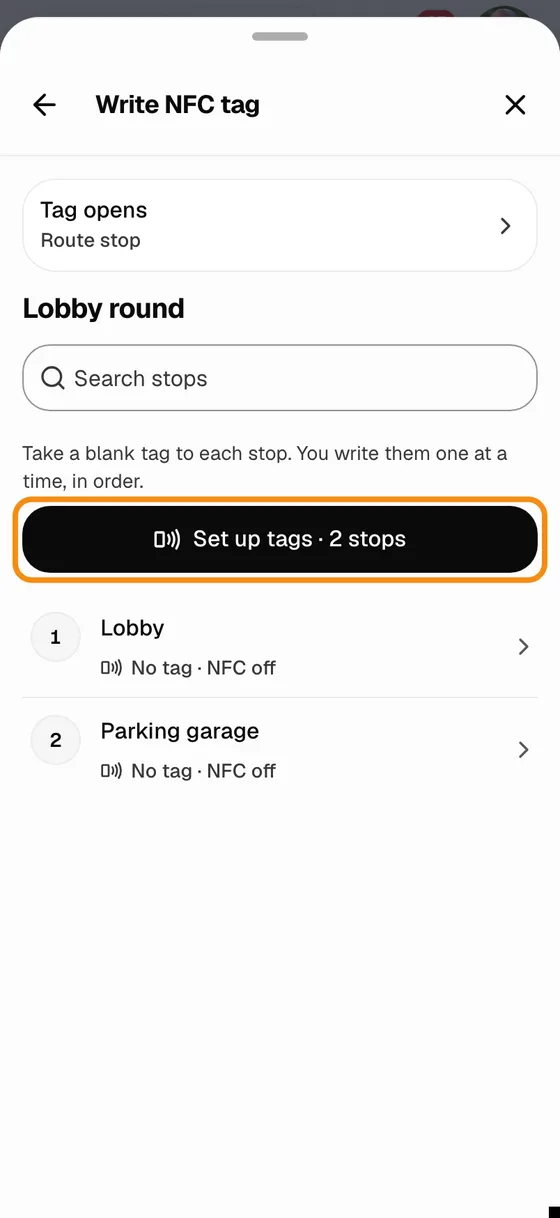
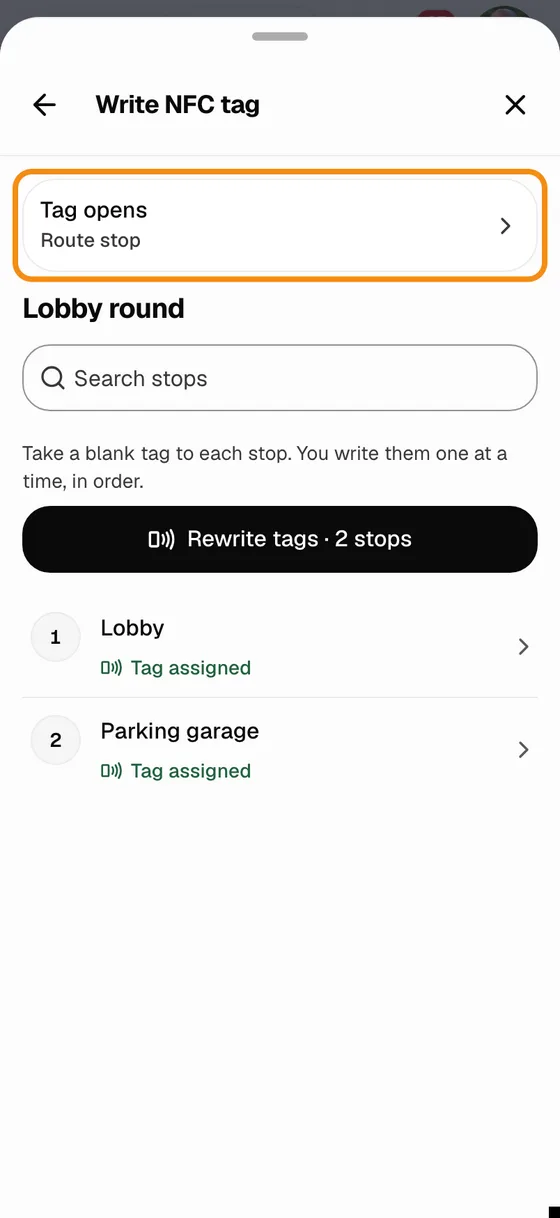
- Tag opens: Route stop is picked at the top. Tap the route template, then Set up tags.
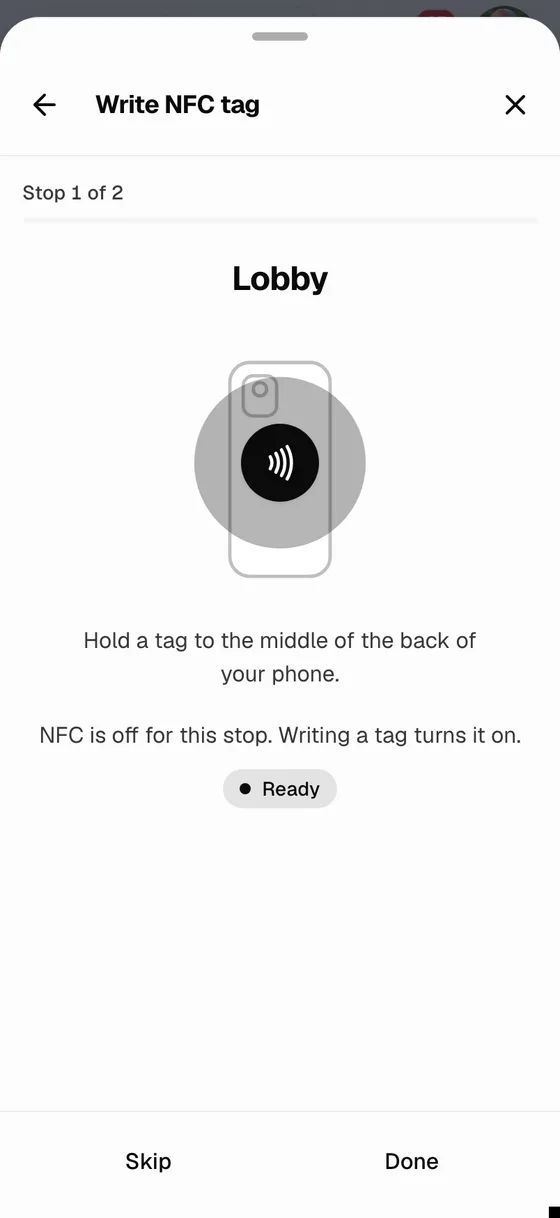
- Walk to the first stop with a blank tag. The screen shows the stop's name.
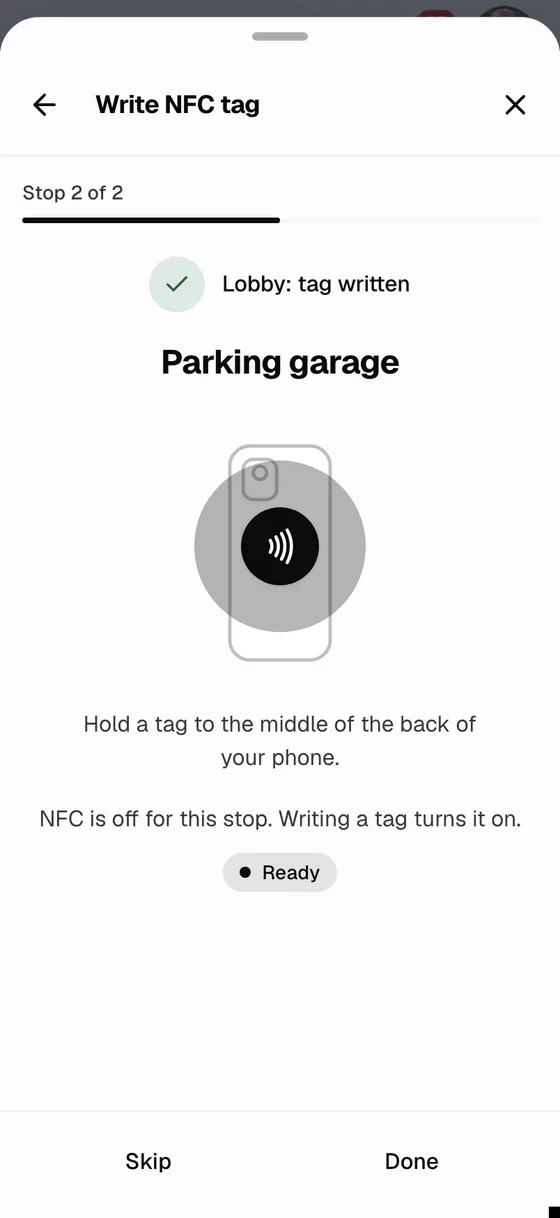
- Android: hold the tag to the middle of the back of the phone. iPhone: tap Write tag, then hold the tag to the top of the phone.
- When it says tag written, it moves on to the next stop. Stick the tag up at that stop.
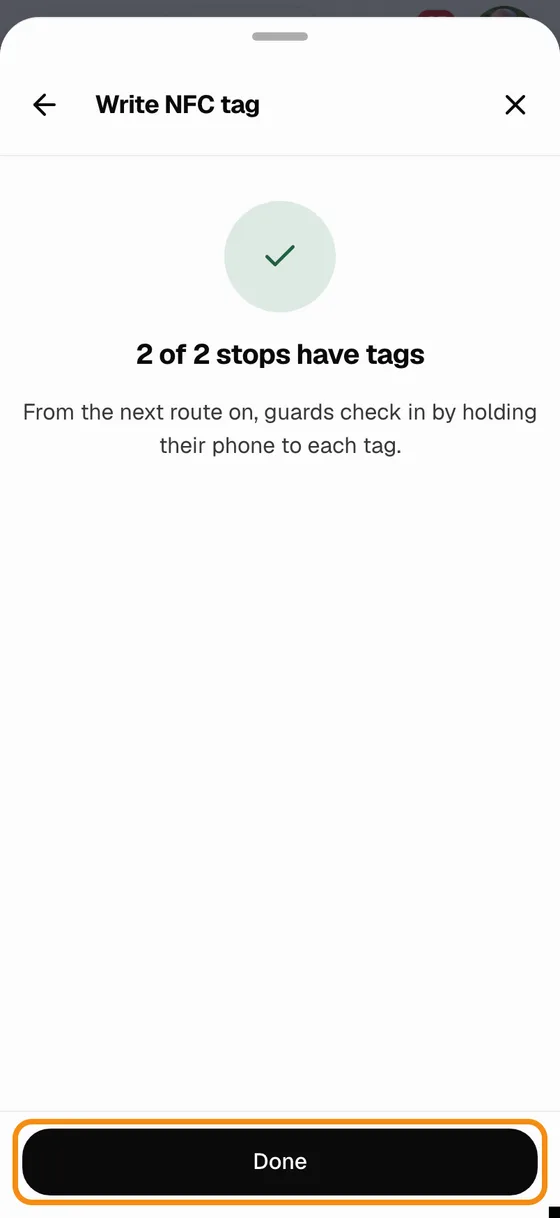
- At the end it shows how many stops have tags. Tap Done. From the next route on, guards tap these tags to check in.
- A tag takes the place of the QR code at that stop. To keep using the stop's QR sticker, don't write a tag there.
Step 7Write one tag for a whole location
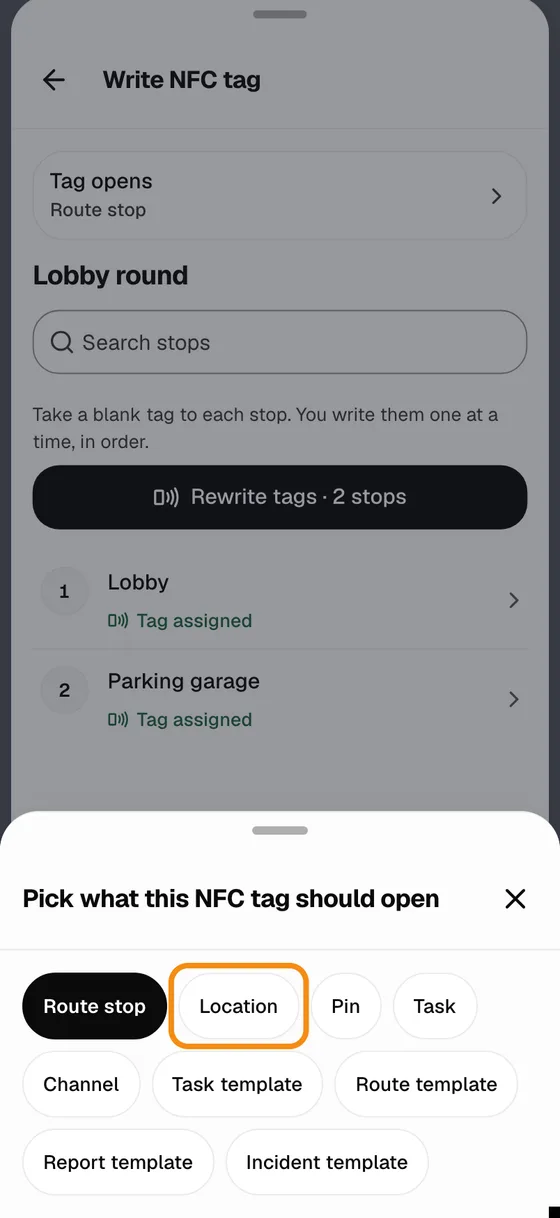
- On Write NFC tag, tap Tag opens at the top and pick Location.
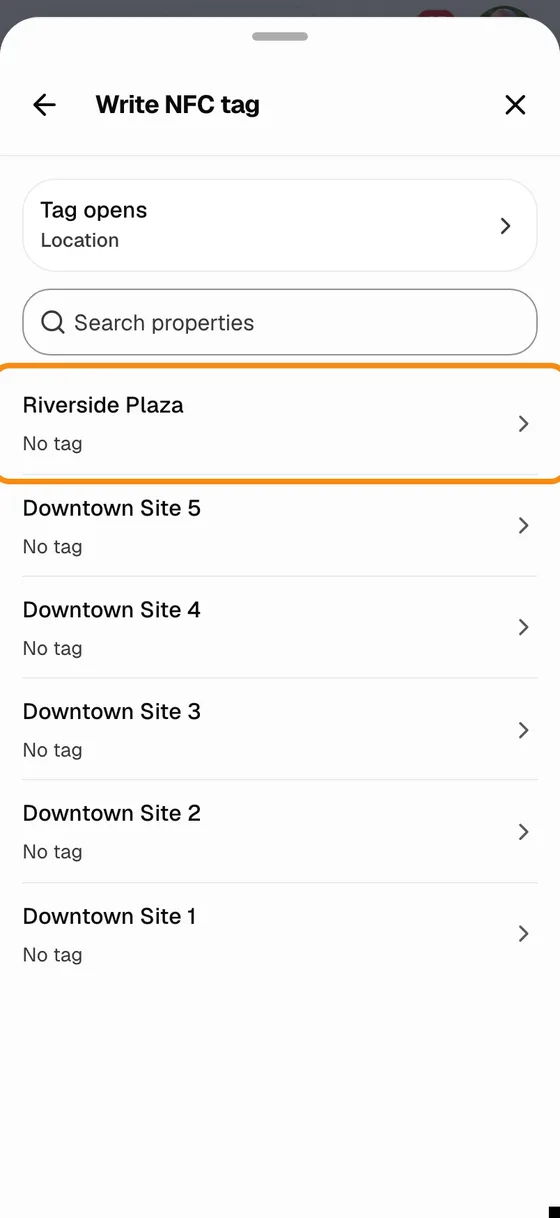
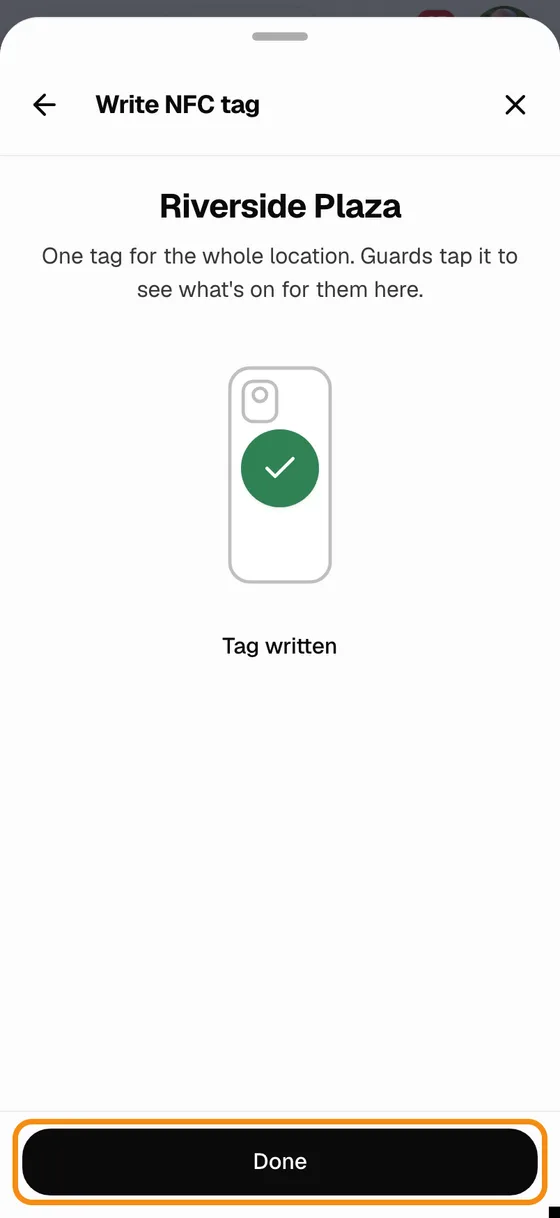
- Tap the location, then hold a blank tag to the phone the same way. Or open the location in the app and tap Set up NFC tag.
- Post it at the entrance. A guard who taps it sees what is on for them there: their shift, clock-in and routes.
- Writing a new tag for the same location or stop makes the old one stop working. A locked tag can never be changed.
Good to know
- QR code or NFC tag
- Both prove a guard was at the stop. A QR sticker costs only paper. An NFC tag is quicker to tap and works in the dark.
- Your team's words
- Your team can rename things, so your screens may say Patrols for Routes, Checkpoint for Stop, or Site or Property for Location.
- One code per stop
- Each stop has its own sticker or tag. Put each one at the stop with the same name.
- The short code
- The letters under a stop sticker. If your team allows it, a guard whose camera won't scan can type it in.
- A code that opens a record
- Most records (a task template, a report template, a chat) have Share link QR in their three-dot menu. Scanning it opens that record. It does not check a guard in.
- How guards scan
- See the guide for guards: Scan QR on Home, or the scan button on the patrol stop.
- Who can do this
- Owners, admins, managers and dispatchers. Guards only scan.
If something looks wrong
- No Stop stickers in the menu
- QR code scanning is off for your team. Turn it on in Team settings.
- The sticker window is empty
- No stop on the plan asks for a QR scan yet. Edit the plan, set each stop's proof to QR code, and save.
- A printed code won't scan
- Print it bigger, keep it flat and out of glare, and don't cover it with shiny tape.
- The phone doesn't react to the tag
- iPhone: hold the top edge to the tag for a second. Android: hold it to the middle of the back, and check NFC is on in Settings. Thick or metal cases block it.
- "This tag is locked and can't be changed"
- The tag was made read-only. Use a new tag.
- "This tag is too small for the link"
- Use an NTAG213, NTAG215 or NTAG216 tag.
- "The tag moved away too soon"
- Hold the phone still on the tag until it says Tag written.
- No Print on Android
- Save the picture to Photos, open it, tap the three dots, then Print. Or print it from the computer.